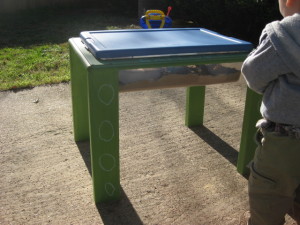
 A few days ago, we visited the Children’s Museum at the Museum of Nature and Science. We’ve been a few times before, but this time Kyler was really interested in the water table and the sand table. He is finally old enough to sit or stand at the tables and really concentrate on what he was doing for quite a while. I immediately knew I needed this at home! Playing with sensory tubs is such a great age-appropriate activity, and having an actual table/station for a toddler to do this just might ensure a little extra time spent playing (at least for mine it does).
I started looking on Craigslist to see if I could find a used sensory table….with no such luck. I used to teach Pre-K, so I knew something like this would be expensive, and I was right. A new sensory table retails anywhere from $60-$250! Ha! I laugh in the face of ridiculously overpriced plastic! So I headed out to the thrift store and Home Depot with the hubby and kid in tow to get to building. Here is a quick little tutorial on how to make your own sensory table:
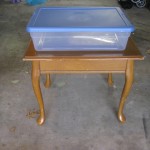 Find a used piece of furniture (from a thrift store, yard sale, etc.) that is the desired size of your sensory tub. I wanted something small and the perfect height for Kyler to either sit or stand at. If you want a big sensory tub, a long coffee table would be perfect. I found this little side table and snatched it up for 10 bucks. I also picked up this small-ish storage bin at home depot for about $3.
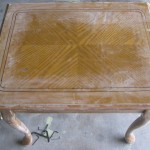 Flip your storage bin over on top of the furniture and trace around edge with a marker onto the furniture. Then measure in where you want the ledge to sit (in order to be sunk down into the table) and mark off an inner edge where you will actually cut. We measured out just enough so that when the bin was in the table, we could still snap the lid on the bin.
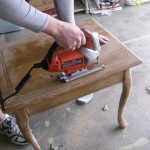 Cut along inner edge with a jig saw to cut the space for the tub to sit in. This is where our project got sad and we had to improvise. We didn’t do precise measurements at the store, so when we were cutting, we ran into some mean corner brackets. We ended up having to take the table apart, take off the legs, and add our own legs (made by 2x4s we had on hand). Moral of the story: measure first!
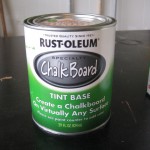 After you have made your space for your bin, it’s time to get creative. You can paint your table however you want. I used some green chalkboard paint I had on hand from an old project. I just primed first, put on a few coats of paint, and let dry over night.
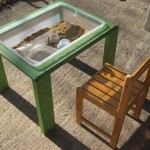 After everything is dry, insert your tub into the table and fill with your first activity. We filled ours with some sand we picked up from Home Depot and some simple kitchen tools for playing. I decorated the table a little with some chalk doodles, but I’ll let the boy handle most of that!
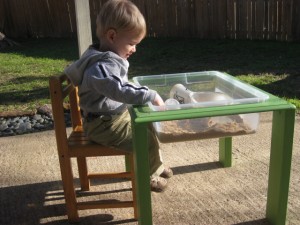
Kyler has absolutely loved playing with this. He will sit in his little chair for at least an hour just playing and learning. When he is done, I just pop the lid on and store outside. When I’m done with the sand, I will just wash it out and fill it up with a new activity, maybe something I can do inside since it’s so cold outside. Here are just a few options for filling your sensory table:
- water
- sand
- rice/beans/dry pasta
- shaving cream
- cotton balls
- shredded paper
- plastic eggs for Easter
- marbles
The possibilities are endless! You could even put paper and paint in there to let your child paint without it making a huge mess. Just be careful if you have a little baby around since most of these objects are major choking hazards. Once you have completed your DIY sensory table, sit back and enjoy watching hours of child-directed, hands-on fun! Here is a great post with tons of more ideas to fill your sensory bins.





beyond impressed at your mad skills! We have one of those bins in the garage with dried beans in it and the boy is crazy for it! I may have to take on this project though!
This is awesome! I never would have thought of this!! We actually have an end table I don’t want anymore, and this would be a great way to repurpose it.
Thanks for adding another DIY project to my “hubby do” list. 😉
Wow I am so impressed that y’all made that! So creative. I will have to follow this tutorial when Cambry gets older.